What Is Water Restoration? A Complete 2026 Guide for Henderson Homeowners
Quality 1st Restoration
The short answer
Water restoration is the full job of getting your home back to how it was before a leak or flood. That means finding where the water went, pulling it out, drying the structure until meters confirm it, cleaning and treating what got wet, and rebuilding whatever had to come out. The emergency half is usually called mitigation; the rebuild half is what most people mean by restoration.
What Water Restoration Actually Means
Water restoration is the work of returning a home to its pre-loss condition after water gets where it shouldn’t. It starts with finding every spot the water reached and ends when the last piece of drywall, flooring or trim is back in place. Between those points are extraction, drying to measured targets, antimicrobial treatment and repairs.
Plenty of people picture a couple of fans aimed at wet carpet. That’s part of the job. On its own, it usually isn’t enough.
What falls under the term
When a restoration company says it handles water restoration, the job normally covers:
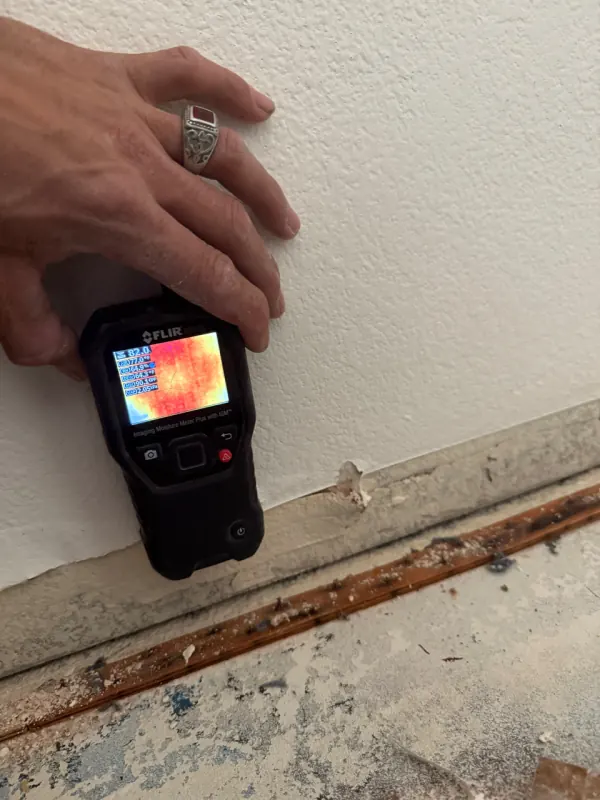
- Moisture mapping with meters and a thermal camera, so the crew knows where water traveled
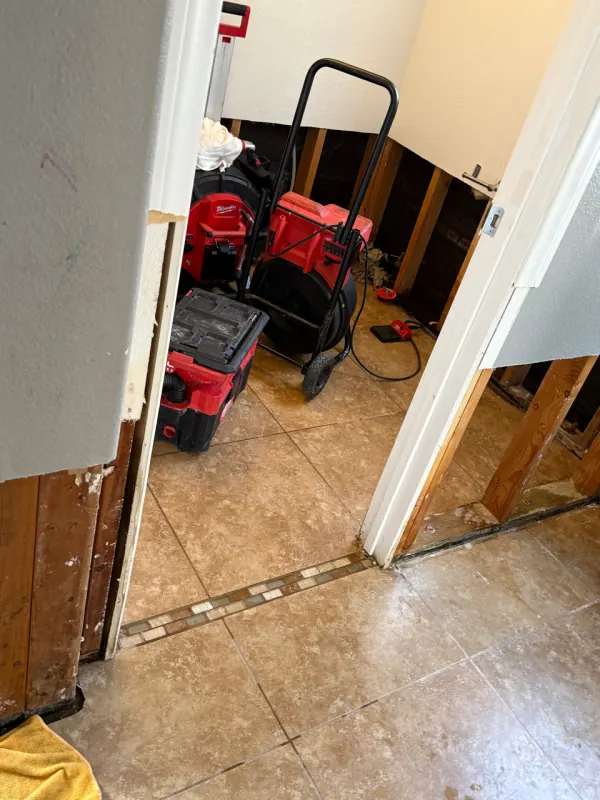
- Extracting standing water and pulling out materials too soaked to save, like carpet pad or swollen baseboard
- Structural drying with air movers and dehumidifiers, checked with daily readings
- Cleaning and antimicrobial treatment of affected surfaces and contents
- Rebuild work: drywall, paint, flooring, trim, sometimes a vanity or cabinet base
- Photos and moisture logs for your records and your insurance file
What it doesn’t cover
Water restoration fixes what the water damaged. It doesn’t fix the thing that leaked. A split supply line or a failed water heater is a plumber’s job, and a roof leak goes to a roofer. We’ll tell you who to call, and we can start drying as soon as the source is stopped. We also don’t repair HVAC equipment or appliances, and we don’t install leak sensors or automatic shutoff valves.
What it tends to cost
A typical dry-out in the Las Vegas valley runs about $1,500 to $4,800. If materials had to come out, the rebuild afterward often costs roughly twice the dry-out. Where yours falls depends on how far the water spread and what had to be removed. Our water damage restoration cost guide covers the dry-out, and the water damage repair cost breakdown walks through the rebuild side. We give free on-site estimates, and there’s a discount if you’re paying yourself instead of going through insurance.
When a home needs it
Most jobs we see in Henderson start with something ordinary: a supply line under the kitchen sink, a toilet that overflowed, a water heater that let go in the garage, or a monsoon storm that found a gap. The water spreads farther than it looks. It runs under tile, soaks the bottom of cabinet bases and wicks up into drywall. What you see on the floor is only part of it.
We see homeowners try to handle it with a shop vac and a box fan. By the time they call, moisture has climbed into the wall cavity and mold is starting behind the drywall. A two-day delay turned a manageable job into a bigger one.
In Green Valley and Anthem homes, we regularly find water trapped under vinyl plank flooring that looks dry on top. A thermal camera shows temperature differences, not water, so a cool patch on the screen gets confirmed with a moisture meter before anyone calls it wet or dry. Without that check, you’d never know.
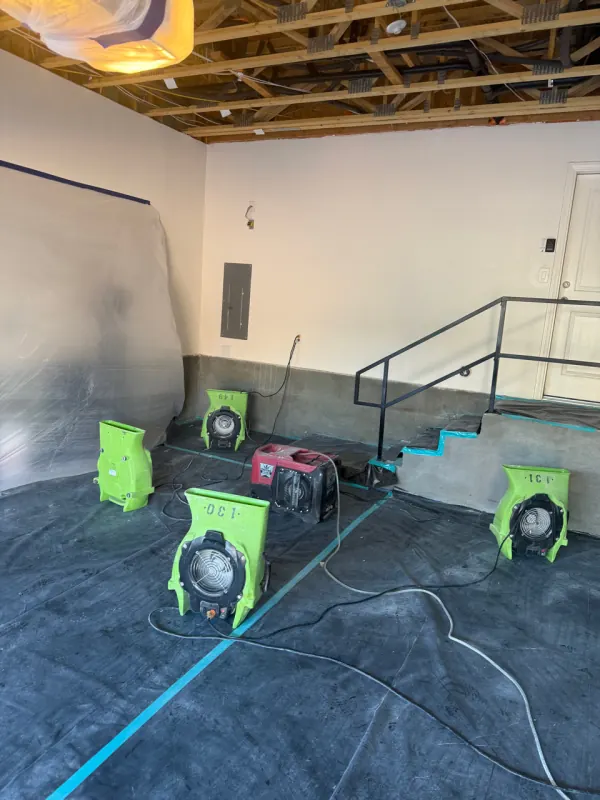
Drying is the technical part. Technicians size the equipment to the room and set it in a pattern: air movers push air around the room in a circle, like a slow tornado, and a dehumidifier in the middle pulls the moisture out of that air. They adjust it each day based on psychrometric readings, which means the math of how much moisture the air can hold. Too few air movers and the space won’t dry. Fans without dehumidifiers push moisture around the house instead of removing it.
Documentation runs through the whole job. Photos, moisture logs and equipment records give your insurance carrier something concrete to review, and they show the work was done right.
Restoration done wrong leaves secondary damage behind: a warped subfloor, mold inside a wall, a musty smell that never leaves. Done right, those problems don’t get a chance to start.
The Order of the Work Matters
Water restoration follows a fixed sequence because each phase depends on the one before it. You find the water, remove it, dry what’s left, clean the affected surfaces, then rebuild. Our water damage restoration services keep inspection, drying, cleanup and repair in one coordinated job so nothing gets skipped between crews.
This page explains what water restoration is. For the day-by-day version, from the first phone call to the final moisture check, read what happens during water restoration.
A few parts of the sequence are worth knowing before anyone shows up:
- The water gets classified first. Clean water from a broken supply line is Category 1. Gray water from a dishwasher overflow is Category 2. Sewage or floodwater is Category 3. The category decides the safety steps and how much material has to come out.
- Speed changes the size of the job. Mold can start within 24 to 48 hours, according to the EPA, so extraction and drying start as soon as the source is off.
- Drying is the longest phase. It usually runs three to five days, and it ends when readings hit the target, not when the floor feels dry.
- Rebuild comes last. Drywall, paint and flooring go back only after the structure is confirmed dry.
Why the order can’t change
Painting a wet wall sounds ridiculous. That’s basically what happens when someone rushes past drying. We see it in Green Valley and Anthem all the time. A homeowner gets anxious, wants the house back and pushes for early repairs. Weeks later there’s mold behind the new drywall.
Drying time depends on the materials. Hardwood needs a different setup than carpet, and plaster holds water longer than standard drywall. A good crew moves equipment and adjusts airflow based on what each day’s readings show.
The inspection at the start isn’t a quick walkthrough, either. Moisture hides behind walls that look fine. Skip the meters and you’re guessing. Guessing leads to mold.
Henderson’s desert air can fool you into thinking things dry out on their own. They don’t. Not inside a wall cavity, not under tile. Proper water restoration means checking with instruments instead of assuming.
Water Mitigation and Water Restoration Aren’t the Same Thing
People use the two terms interchangeably. They aren’t, and mixing them up causes confusion when you’re reading an estimate or talking to your insurance carrier. We cover the comparison in more depth in water mitigation vs. restoration, but here’s the short version.
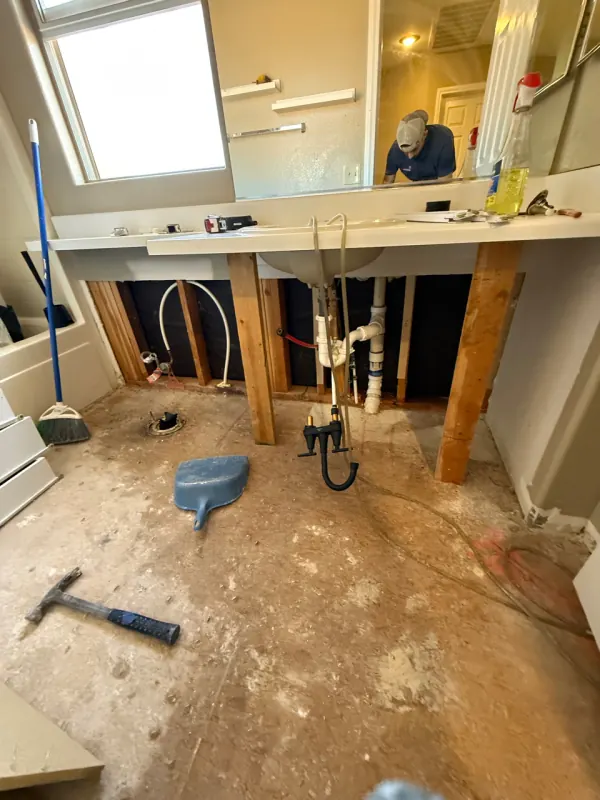
Water mitigation is the emergency phase: the work done right away to keep damage from getting worse. Water restoration is the rebuild phase, the work that puts your home back the way it was. Some people use “restoration” for the whole job, start to finish, which is fine as long as everyone knows which part they’re talking about.
Picture a pipe bursting in your kitchen at 2 a.m. The mitigation crew shows up to extract standing water and check walls and subfloor with moisture meters. Before they cut out wet drywall that can’t be saved, they seal the kitchen off with plastic and a zipper door. Then the air movers and dehumidifiers go in. The goal is stopping the spread before it reaches the living room.
What mitigation covers
Mitigation is fast, focused work. It typically includes:
- Emergency water extraction with truck-mounted or portable units
- Structural drying with dehumidifiers and air movers
- Moisture mapping with thermal imaging to find hidden pockets of water
- Removing materials too saturated to dry, like carpet pad or swollen baseboards
A homeowner thinks the water’s gone because the floor looks dry. But moisture trapped behind cabinets or under tile can start mold growth within 48 hours. That’s why IICRC-certified technicians record moisture readings at every visit. The numbers tell the real story.
What restoration covers
Once everything is dry and documented, restoration begins. This is the part that makes your house feel like home again.
It might mean new drywall and paint, new flooring, or rebuilding a damaged vanity. Sometimes it’s one section of baseboard. Sometimes it’s a bathroom taken down to the studs. The scope depends on how much damage the water did before mitigation started.
Your insurance adjuster usually looks at the two phases as separate line items. Whether either one is covered is up to your carrier and your policy. What we can do is document both phases so the adjuster has what they need to decide.
Timing is the reason the distinction matters. The faster mitigation starts, the less restoration you’ll need. A small leak caught early might need a couple of days of drying and a coat of paint. The same leak ignored for a week can mean tearing out a wall and replacing subfloor.
We photograph every step of both phases and keep the moisture readings and scope notes together, so you have a clear record of what was done.
One more thing. Not every company handles both phases. Some only do mitigation, then hand you off to a general contractor for the rebuild. That handoff is where details get lost and schedules slip. If you’re looking for water restoration in Henderson, our water restoration service page explains how both phases run together under one roof.
Mitigation stops the damage. Restoration repairs it. You need both done right.
Water still spreading? Every hour it sits, the repair gets bigger.
Quality 1st Restoration answers 24 / 7 / 365 across Henderson and the Las Vegas Valley.
888-453-3591