
Quality 1st Restoration home

Water Mitigation in The Lakes, Las Vegas: When a September Storm Came Through the Balcony

Quality 1st Restoration
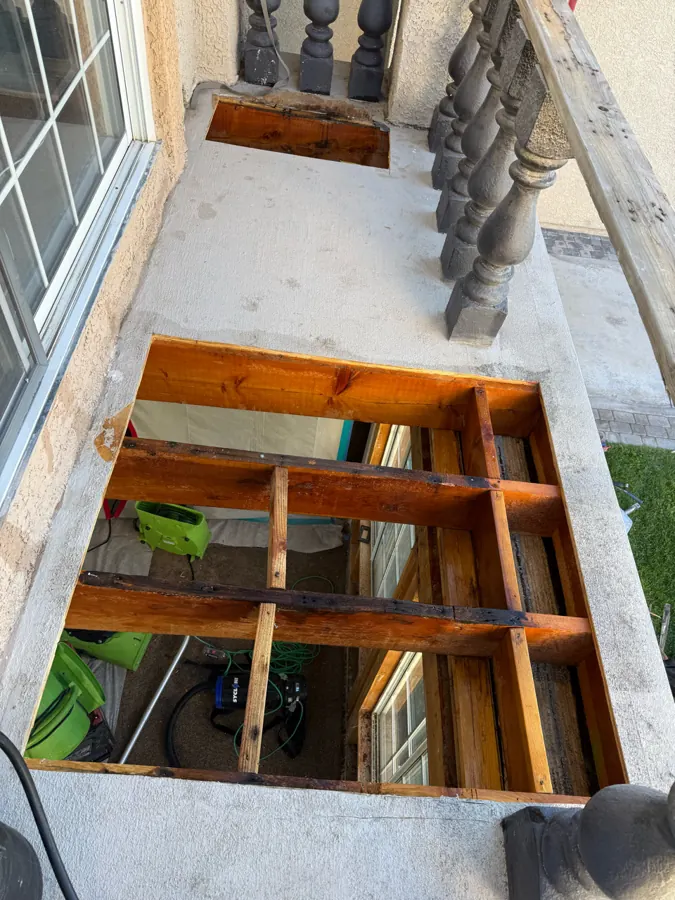
Balcony deck opened down to the joists to expose water-damaged framing on a two-story home in The Lakes, Las Vegas

The short answer

When late-September storms hit the west valley, rain got through a balcony deck in The Lakes and into the front room below. We mapped the wet areas with thermal imaging, sealed off the room, removed wet drywall and insulation, opened the deck and dried the framing. The mitigation came to about $3,000.

The Short Version

Las Vegas doesn’t get rain often. When it does, it rains hard. In late September, storms pulled up moisture from the remnants of Hurricane Odalys and swept across the valley. The west side got more than the airport did: the Review-Journal reported 0.59 inches in South Summerlin and 0.31 inches in Spring Valley, with The Lakes sitting right between them.

At a two-story home in The Lakes, that rain found its way through the second-floor balcony and into the front room underneath. After the storm, there were brown spots on the ceiling and paint lifting at the top of the windows.

This was a small job. The mitigation came to about $3,000, and the crew finished it quickly. Small jobs are worth writing about because they’re the ones most homeowners actually face. Nobody had a flooded house here. They had a few stains after a storm. The same home also had a separate roof leak over the upstairs hallway, so you’ll see both areas in the photos below.

The Neighborhood: Why The Lakes Sees This

The Lakes is the master-planned community built around Lake Sahara, between Sahara Avenue and Desert Inn Road. A lot of its homes date to the late 1980s and 1990s. You see a lot of stucco two-stories with tile roofs, and plenty of them have a front balcony sitting directly over a living room or bedroom.

That design looks great. It also means there is a waterproofed deck over finished living space. If water gets through that deck, it has nowhere to go but down into the room below.

Most days, that deck just sees sun. Then a storm drops a lot of water in a short time, and it runs across the deck, into the corners and along the edges where the deck meets the wall. If there’s any gap for it to get through, it will find it.

Step 1: Finding Out How Far the Water Went

Before cutting anything, the technician scanned the stained areas with a thermal imaging moisture meter. Wet drywall reads cooler than dry drywall, so the camera shows the shape of the wet area, not just the stain you can see.
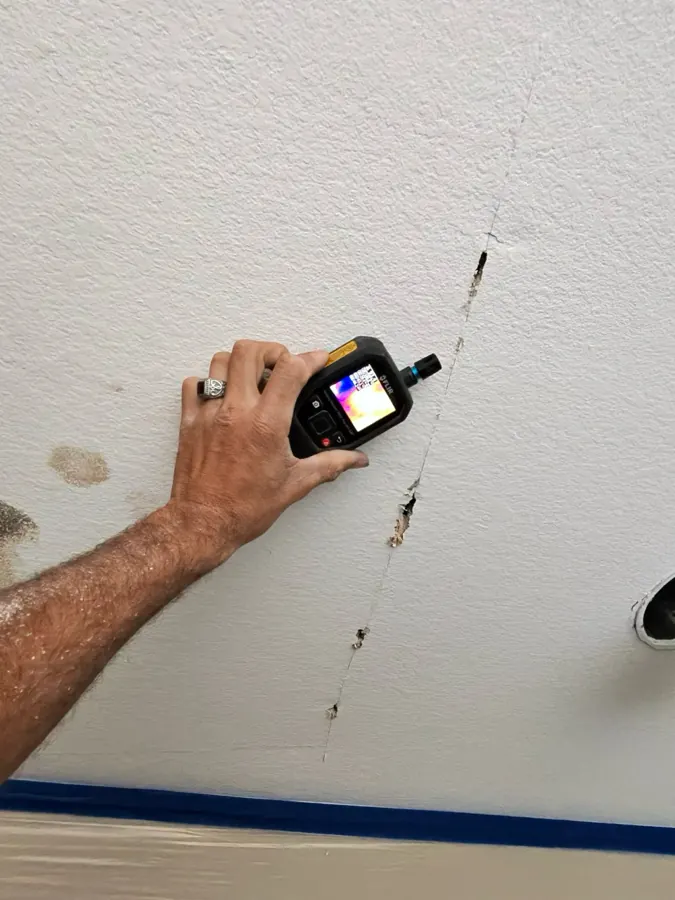
Technician scanning a cracked, water-stained upstairs ceiling with a thermal imaging moisture meter in The Lakes, Las Vegas
Upstairs: thermal scan along a ceiling crack next to a stain.

Upstairs, the wet area followed a drywall seam that had started to crack. Downstairs, the readings lined up with stains on the ceiling and with the tops of the front windows.
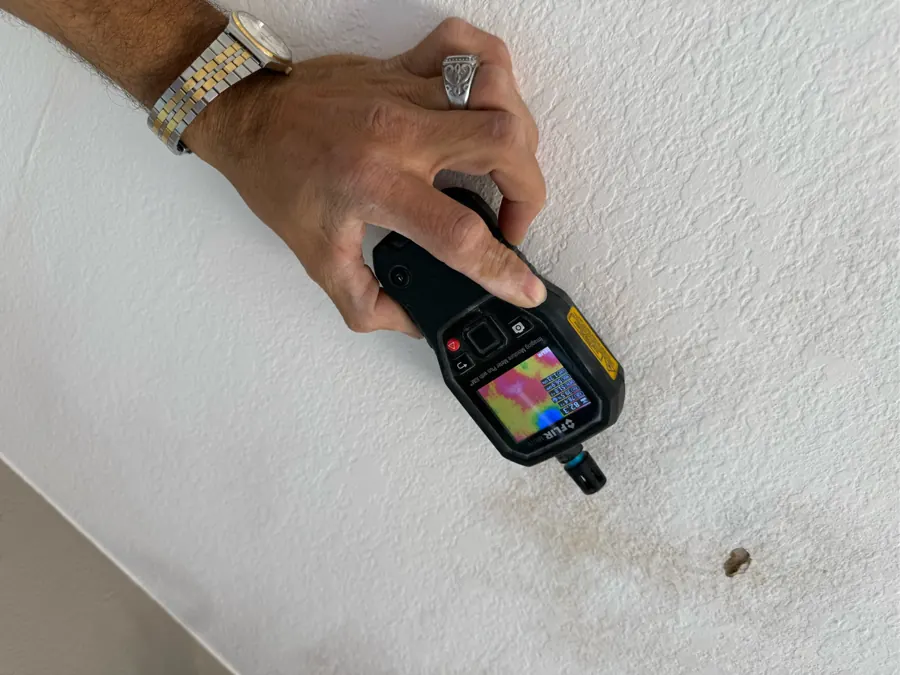
Thermal imaging moisture meter held against a stained downstairs ceiling below a balcony
Downstairs: checking a ceiling stain directly under the balcony.

A thermal camera doesn’t confirm moisture on its own, so every cool spot got checked with a moisture meter too. Those readings went into the job file along with room measurements. That record is what the insurance adjuster and the repair estimate are built on. More on how this works on our thermal imaging water detection page.

Step 2: Sealing Off the Work Area

Opening a wet ceiling throws insulation fibers and drywall dust into the air. So before demolition, the crew built plastic containment with zipper doors. They also covered the floors and taped a filter over the return air vent so the HVAC system wouldn’t pull dust through the rest of the house.
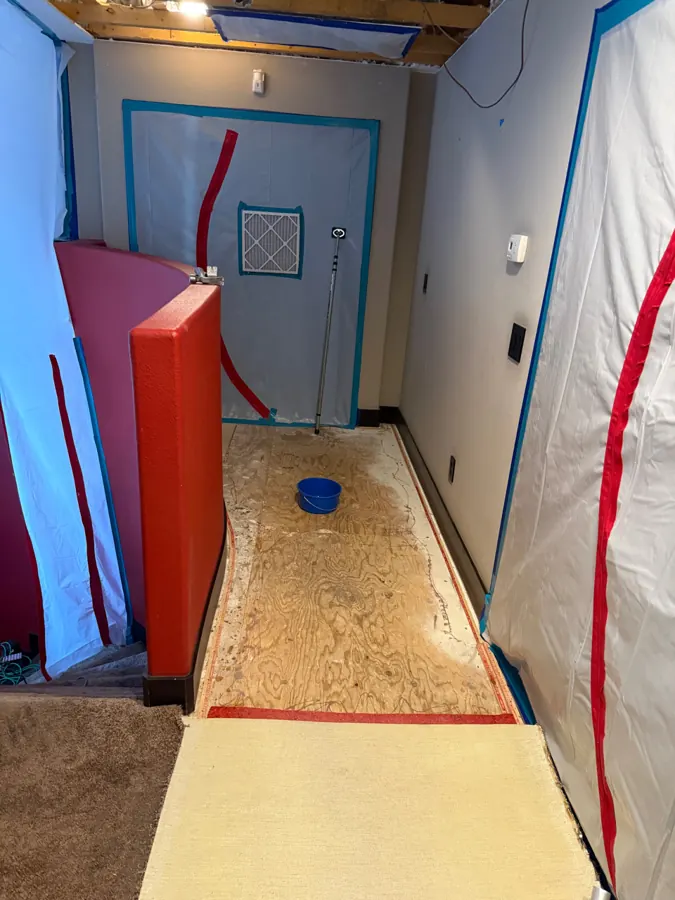
Upstairs hallway sealed with plastic containment and zipper doors, carpet pulled back to expose the plywood subfloor
The upstairs hallway, sealed off, with the carpet and pad pulled back so the subfloor could dry.

Step 3: Taking Out What Couldn’t Be Saved

Wet drywall sometimes dries in place. Wet ceiling drywall with soaked insulation sitting on top of it usually doesn’t. The weight sags the ceiling, and the insulation holds water against the board for days. On this home, the crew cut out the stained sections and pulled the wet insulation.
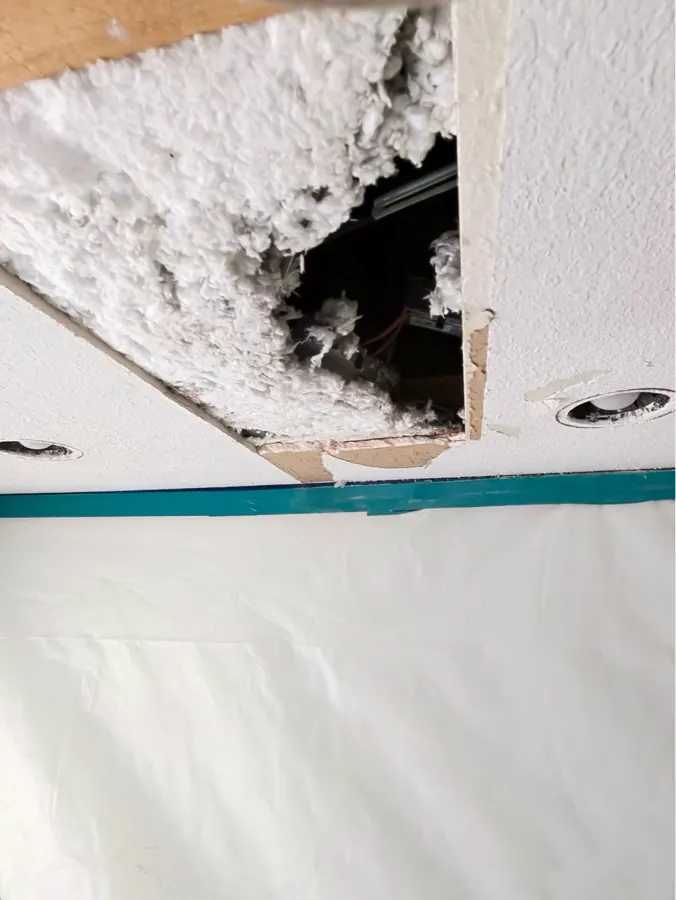
Video: pulling down the wet upstairs ceiling inside the containment.
Section of upstairs ceiling drywall removed to reveal wet blown-in insulation above
Opening the upstairs ceiling. The insulation above it was wet.

Downstairs, once the ceiling and the wall above the windows came open, the framing showed where the water had traveled.
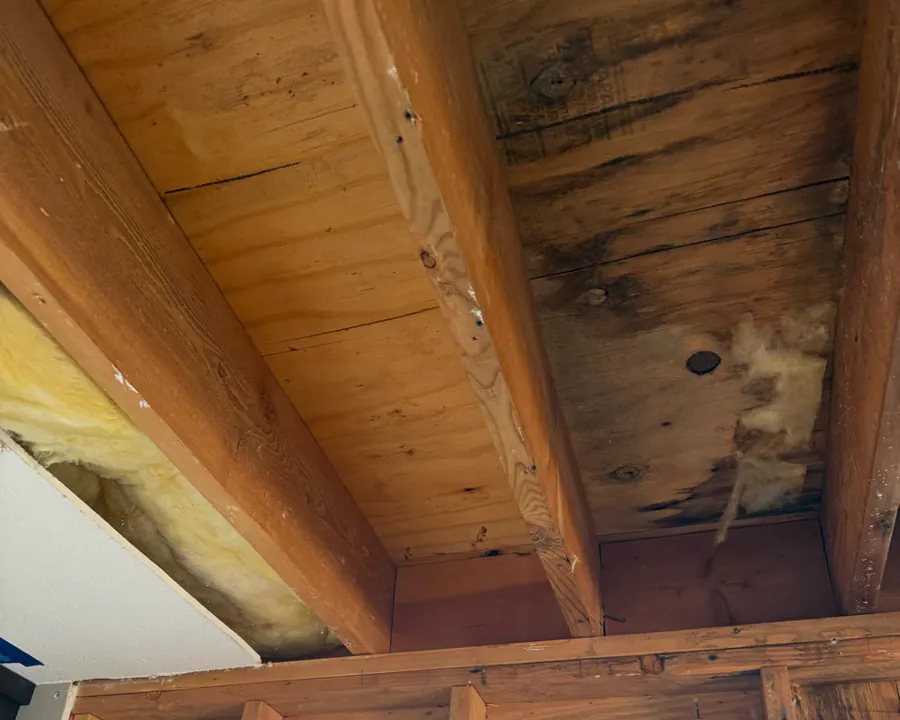
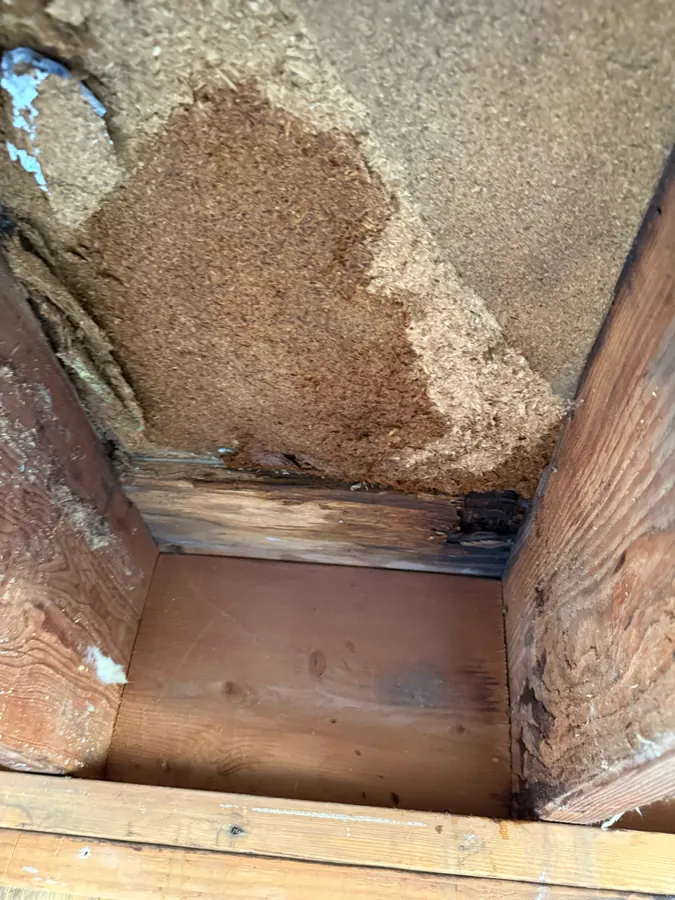
Video: a walk through the front room after the storm, with the wet ceiling and the wall below the windows opened up.
Dark water staining on the joists and subfloor of the balcony deck, seen from the room below
Looking up into the ceiling of the front room. The dark staining is the underside of the balcony.
Water-stained wall sheathing inside an opened wall cavity above a window
Inside the wall above the windows: the sheathing was wet and stained.

Step 4: Drying the Structure

With the wet materials out, the crew set dehumidifiers and air movers in both areas, plus an air scrubber to filter the air while the work was going on. Air scrubber use is included at no extra charge on our jobs, even when insurance won’t pay for it.
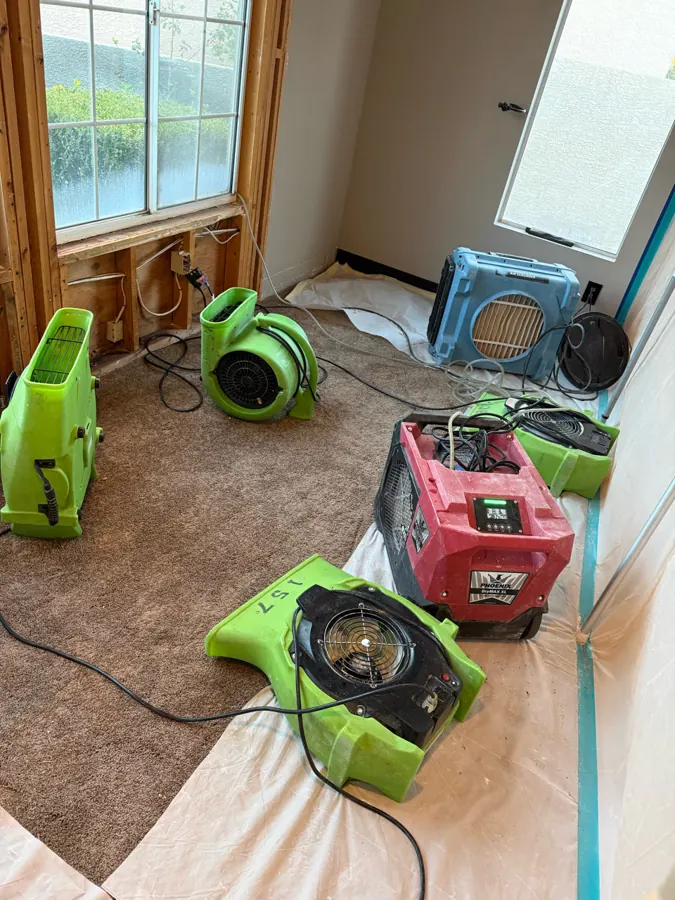
Air movers, a dehumidifier and an air scrubber drying the opened front room of a home in The Lakes
Drying equipment in the front room, with the wall framing below the windows opened up.

The goal isn’t “it feels dry.” It’s moisture readings that match the dry, unaffected wood elsewhere in the house. The meter goes back on the same spots until the framing gets there. Our structural drying page walks through how that is measured.
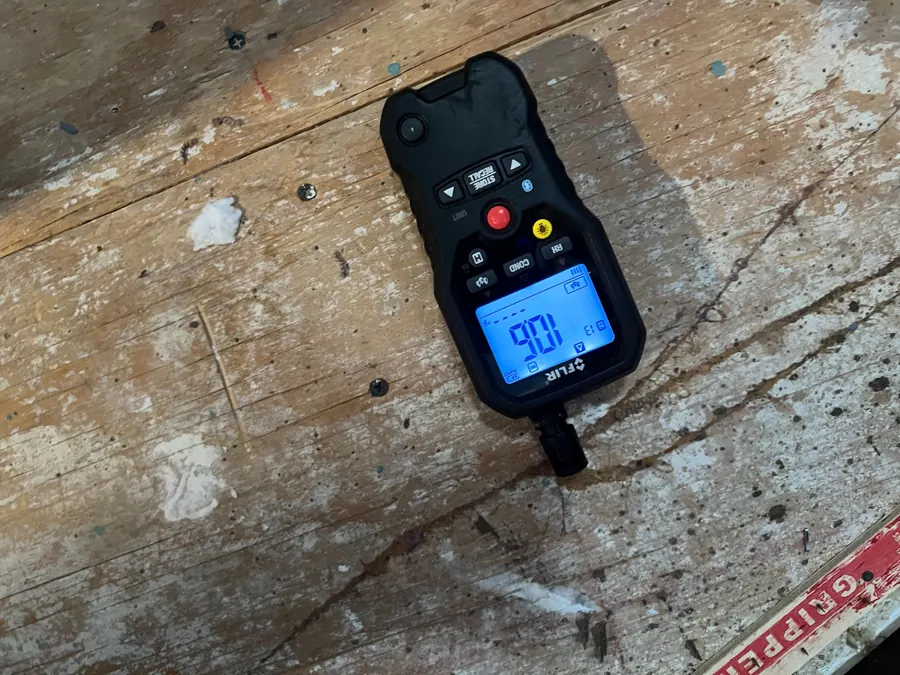
Moisture meter resting on the exposed plywood subfloor during drying
Checking the upstairs subfloor with a moisture meter.

The Source: The Balcony Deck

Drying a room doesn’t help much if the next storm sends more water in. The stains downstairs sat right under the balcony, so that’s where we looked next.

From the top, the deck coating looked mostly intact. When we cut into it, the plywood underneath was soaked.
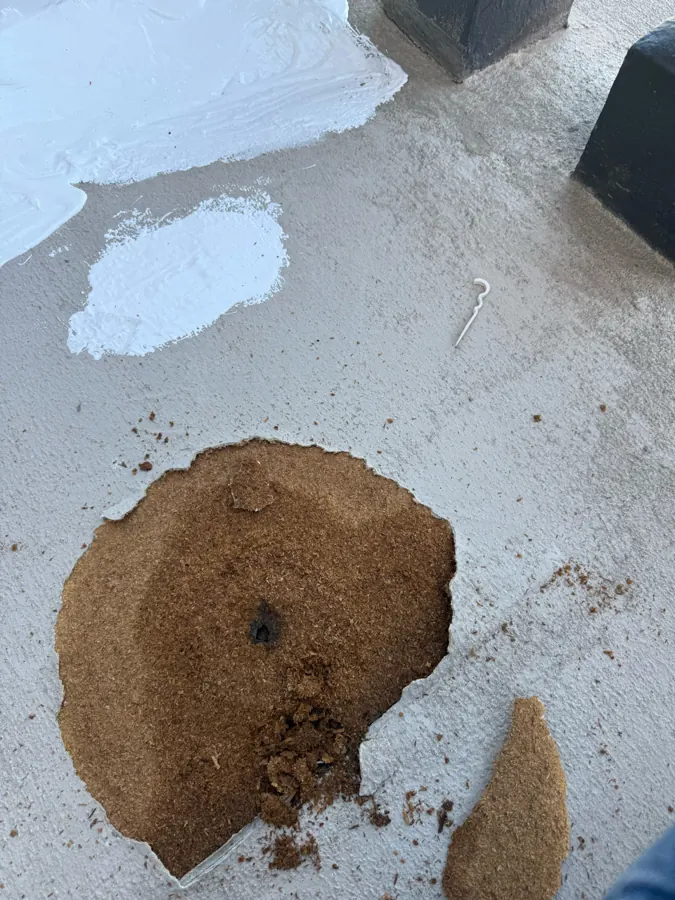
Balcony deck coating cut open, exposing wet wood underneath
The first cut into the balcony coating. Just under the surface, the wood was wet through.
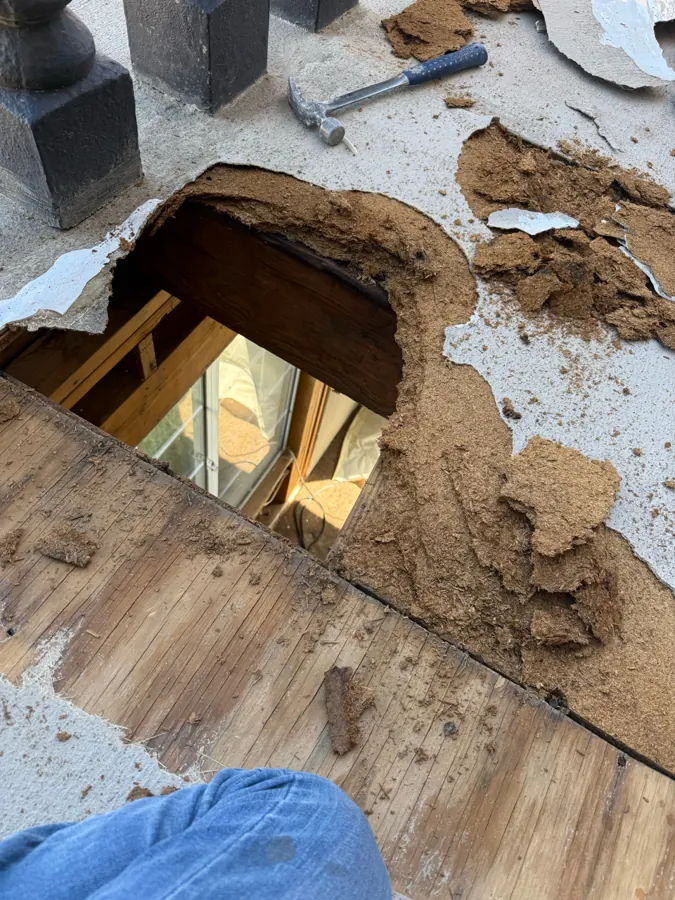
Wet balcony plywood opened up, with the room below visible through the hole
The wet decking opened up. You can see straight down into the room we were drying.

This is the part homeowners should hear: a balcony can look fine from the top and still let a hard rain through. The coating is the only part you see. The wood that gets wet is underneath it, and the first sign usually shows up on the ceiling of the room below.

The damaged decking came off down to the joists so the framing could dry from above as well as below. Then the opening was covered with plastic to keep weather out until the repair crew rebuilt and recoated the deck.
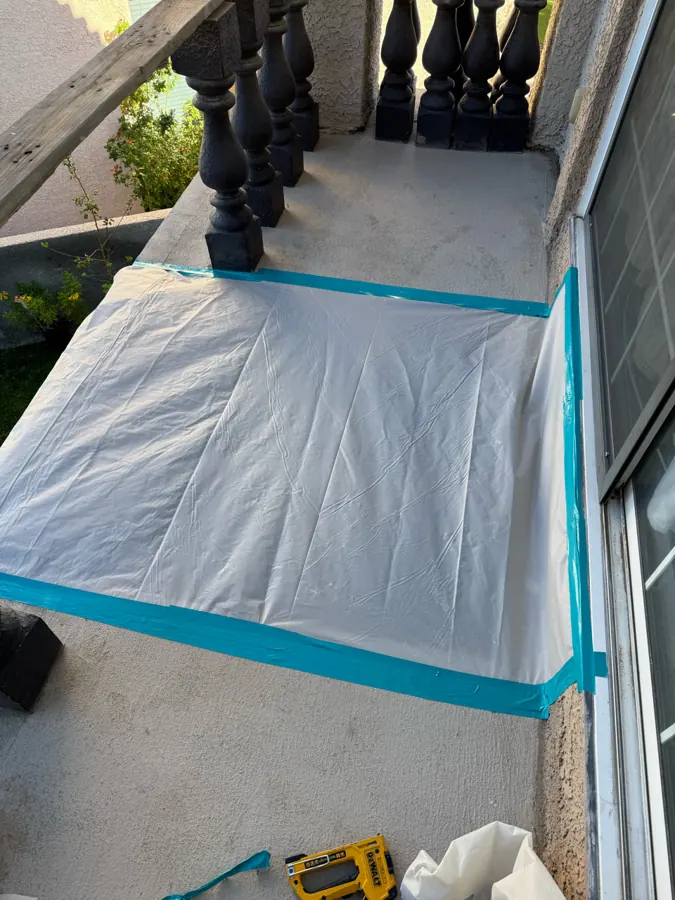
Opened balcony deck covered with taped plastic sheeting to keep out weather
The opened deck, covered and sealed while the structure dried.

Watch More From This Job

We cut three short videos from this job: pulling down the wet ceiling, scanning before we cut and the back side of the ceiling. The rest of our clips are on the water damage videos page.

What a Lakes Homeowner Can Take From This

If your home has a balcony over a living space, a few things are worth checking:

  • Stains on the ceiling under the balcony, even small ones.
  • Peeling paint or bubbling at the top of the windows below the deck.
  • Cracks or soft spots in the balcony’s walking surface.
  • Rust or dark staining where the railing posts meet the deck.

None of these guarantee a leak. If you notice any of them, and especially if you notice them right after a storm, have someone take a moisture reading. Catching it after one rain costs far less than opening up a deck.

If you’re seeing a stain right now, our ceiling water damage and roof leak water damage pages explain what usually comes next. Or call us. An IICRC-certified technician will come out, check the readings with you, and give you a free estimate before anything gets cut.

Water still spreading? Every hour it sits, the repair gets bigger.

Quality 1st Restoration answers 24 / 7 / 365 across Henderson and the Las Vegas Valley.

888-453-3591
Google Reviews

10 reviews with a five-star rating.

Real customer experiences from Quality 1st Restoration across water damage, mold, repairs, and restoration.

5.0 10 verified reviews
Write a review
D

Diane Gutierrez

Verified on Google

“Great price. Highly recommend this company for any service or repair.”
C

Christine Olson

Verified on Google

“Quality First Restoration is fair and they cared about me. They helped me through the entire process...”
J

Jolene Georges

Verified on Google

“I was referred to Quality Restorations from an insurance agent. I was impressed that they answered the call...”
R

Rosely Valdez

Verified on Google

“Literally life savers!! I had been dealing with some skin issues...”
L

Leela Gillins

Verified on Google

“We had a drainage pipe burst inside the wall of our laundry room, and the leak went downstairs...”
A

Al Olson

Verified on Google

“Quality First Restoration is fantastic! The crew did a wonderful job with water damage.”
R

Richard Brain

Verified on Google

“I had the opportunity to meet with Todd. He is knowledgeable and responsive. We made the right choice moving forward...”
S

Sean Bellinger

Verified on Google

“The team at Quality First Restorations did a great job taking care of a water leak above our bathroom...”
C

Caleb Joseph

Verified on Google

“Quality First Restoration did an amazing job from start to finish. Professional, responsive, and high-quality work.”
K

Kyle Zabelny

Verified on Google

“So I've worked with Todd at Quality First Restorations previously on a rental I have. The tenants had a leak...”

People also ask

How much does water mitigation cost for a small leak in Las Vegas? +

This job in The Lakes came to about $3,000 for the mitigation. That covered the inspection, containment, removing wet drywall and insulation, and running drying equipment in two rooms. Your number depends on how many rooms got wet, what materials have to come out, and how long the framing takes to dry. Repairs and rebuild are priced separately.

What is the difference between water mitigation and repairs? +

Mitigation stops the damage from spreading. It means finding the wet areas, taking out materials that cannot be saved, and drying the structure. Repairs come after that: new drywall, insulation, paint, flooring, and fixing whatever let the water in. On this job, the mitigation was finished quickly. The repairs, including the balcony deck, were the bigger and longer piece.

Why does a hard rain in Las Vegas get into a balcony? +

Most balconies built over living space sit on a plywood deck with a waterproof walking coating on top. Las Vegas storms drop a lot of water fast, and it collects at corners, edges and the joint where the deck meets the wall. When water gets past that coating, it soaks into the plywood and runs along the framing into the ceiling and walls below. What you see downstairs is usually only part of where the water went.

Can a ceiling stain mean there is more damage than I can see? +

Yes. A ceiling stain is usually the last place water shows up, not the first. On this home, small stains on the downstairs ceiling led to soaked insulation, stained joists and wet sheathing above the windows. A thermal imaging camera and a moisture meter show how far the water actually went before anything gets cut open.

About the author

Quality 1st Restoration logo

Quality 1st Restoration

IICRC-Certified Restoration Team

Quality 1st Restoration is a restoration company based in Henderson that handles water and fire damage, plus mold, serving homes and businesses across the Las Vegas Valley. Our IICRC-certified technicians handle everything from slab leaks and burst pipes to sewage backups and full rebuilds. This guide reflects the standards we hold on every job. We're available 24 / 7 / 365.

  • IICRC-Certified · Licensed & Insured
  • 5.0★ (10 reviews)

The services behind this answer.

If this is happening in your home right now, these are the crews that handle it. Not sure where it starts? Begin at the water damage restoration service page and we'll scope the whole job.

Water Damage Restoration in Henderson, NV

Need help with water damage, fire damage, mold, or rebuilding?

Call Quality 1st Restoration. We help homes and businesses across the Las Vegas Valley with water damage restoration, fire and smoke cleanup, mold remediation, and building restoration.

Call Us Text Us