
Can You DIY Water Damage Restoration in 2026? What You Need to Know in Henderson
Quality 1st Restoration
The short answer
Sometimes. A small clean-water spill on tile or sealed concrete, caught within a few hours, is a fair DIY job with towels, a wet/dry vac, fans and a dehumidifier. Once the water has sat longer than 24 hours, soaked carpet or drywall, or came from anything but a clean supply line, call a professional. Past that point you need a moisture meter to know whether the structure is really dry.
Why ‘It Looks Dry’ Isn’t the Same as ‘It Is Dry’
Can you DIY water damage restoration? For a small clean-water spill on a hard floor that you catch within a few hours, yes. Shut off the water, pull it up with towels or a wet/dry vac, and run fans with a dehumidifier. If the water sat more than a day, got into carpet or drywall, or came from a toilet, sewer line or outside, you’re past DIY. The rest of this page is about telling those two situations apart.
The mistake we see most: someone mops up standing water, runs a fan for a day or two and calls it done. The floor feels dry. The wall looks fine. Behind that drywall, moisture is still sitting there doing damage.
Water moves.
It wicks into drywall through capillary action. It soaks the tack strip under carpet. It collects under vinyl plank on the slab. In Henderson’s desert climate, the surface dries fast, which makes this harder, not easier. The top layer can look finished while the wet part is still hidden. (We see this after summer AC issues a lot.)
What’s Really Happening Behind the Wall
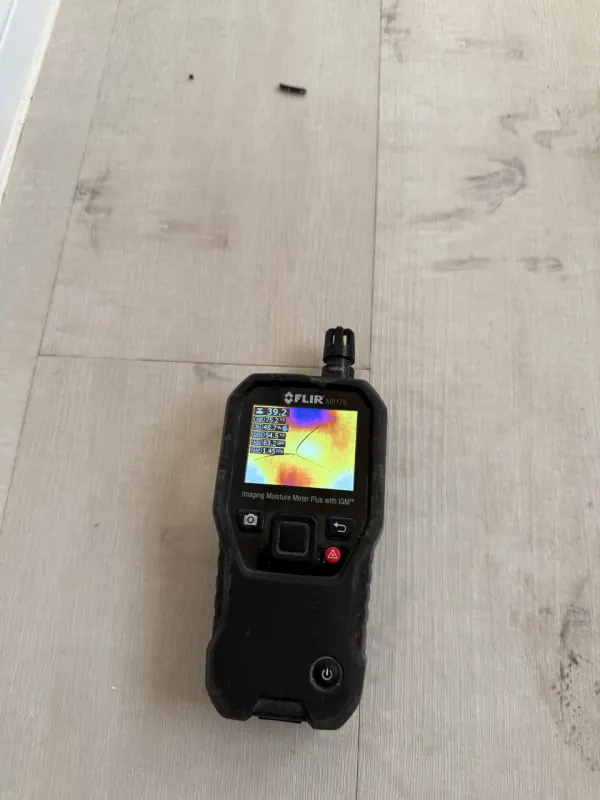
A moisture meter tells the real story. We use pin-type and pinless meters on every job, and the readings behind “dry-looking” walls surprise people all the time. The surface might read 8 percent. Probe two inches into the cavity and you can find readings above 20 percent. That’s active moisture. That’s mold territory.
Thermal imaging cameras show the same issue another way. Cool spots on a wall can point to trapped moisture your eyes can’t see. Without these tools, you’re guessing. Guess wrong, and it costs more than getting it checked. A hallway wall next to the laundry room is a common place to find the first clue.
The 48-Hour Window Matters
Mold can begin colonizing within 24 to 48 hours of water exposure, according to the Environmental Protection Agency. Warm air behind a wall after a summer water heater failure or supply line break doesn’t slow that down.
If you cleaned up the visible water but never checked moisture in the structure itself, there’s a chance something is growing right now.
Where trapped moisture hides after a DIY cleanup:
- Behind baseboards and inside wall cavities, especially on shared walls between rooms
- Under laminate or vinyl plank flooring where water seeps through seams
- Inside cabinet toe kicks in kitchens and bathrooms
- Around door frames and window sills on ground-floor slab homes common in the Green Valley and Anthem areas
Each of these spots needs targeted drying equipment. A box fan from the garage won’t cut it. Cleanup also comes with real risks, so it’s smart to review FEMA’s safety tips for flood cleanup.
The Real Cost of “Dry Enough”
We’ve walked into homes three or four months after a water event where the homeowner thought everything was fine. The carpet smelled a little off. A door started sticking. By the time we opened the wall, the damage had spread far beyond the original area. Delaminated subfloor. Corroded fasteners. Mold colonies on the back side of the drywall.
None of that showed from the living room.
Here’s the part that stings: insurance adjusters look for documentation. Moisture readings and drying logs, plus records of where equipment sat. If you dried it yourself with no records, proving the loss gets a lot harder. Your carrier decides what’s covered, and a thin file can mean a smaller payout or a denial, and you’re left covering repairs that proper water damage restoration would have caught early. If that is the decision you are facing, see when wet materials can be dried and when they need replacement.
If you’ve had a recent water event and you’re not sure whether the structure is truly dry, our water damage restoration team can run a moisture assessment and give you a clear answer.
Dry to the touch isn’t dry to the meter. Only one of them tells you the job is finished.
DIY Water Damage Cleanup: What You Can Reasonably Handle Yourself
Not every water issue needs a crew with truck-mounted extractors. A small leak under the kitchen sink that you catch within an hour? You can probably handle that yourself. Knowing where DIY ends and professional water damage restoration begins is what keeps hidden damage from turning into a much bigger repair.
The water source and the clock matter most.
Clean water from a supply line or faucet is the safest to deal with on your own. If the affected area is small and you act fast, DIY water damage cleanup is realistic. The IICRC classifies this as Category 1 water. It’s the only category where homeowner cleanup makes sense.
Steps You Can Take Right Now
If you’ve got a minor clean-water leak, here’s how to approach it:
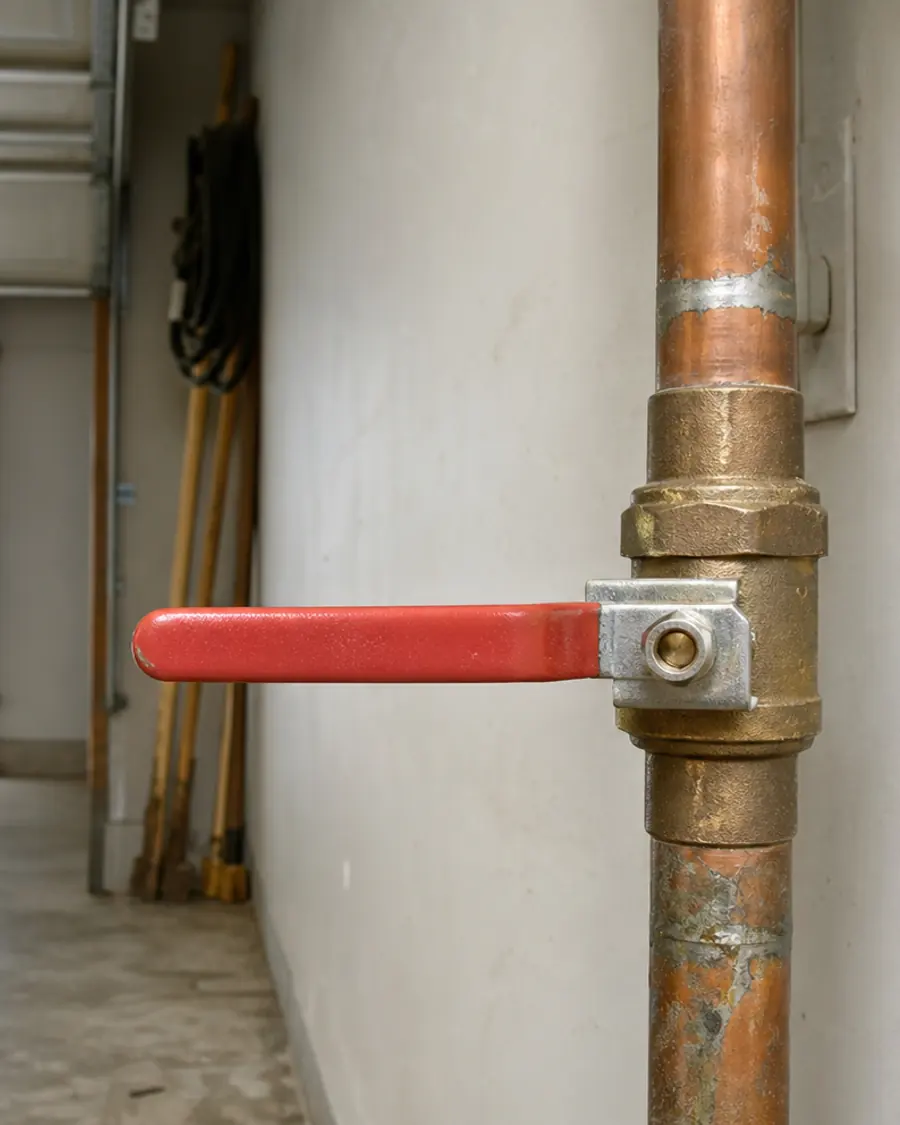
- Stop the water source immediately. Turn off the supply valve or shut off your main line.
- Remove standing water with towels or a wet/dry vacuum. Don’t let it sit.
- Pull up any rugs or movable items from the wet area. Get them outside to dry.
- Set up fans and open windows. Henderson’s dry outdoor air helps here.
- Run a dehumidifier if you have one. Fans without a dehumidifier mostly push moisture around, and enclosed spaces behind walls and under cabinets still trap it.
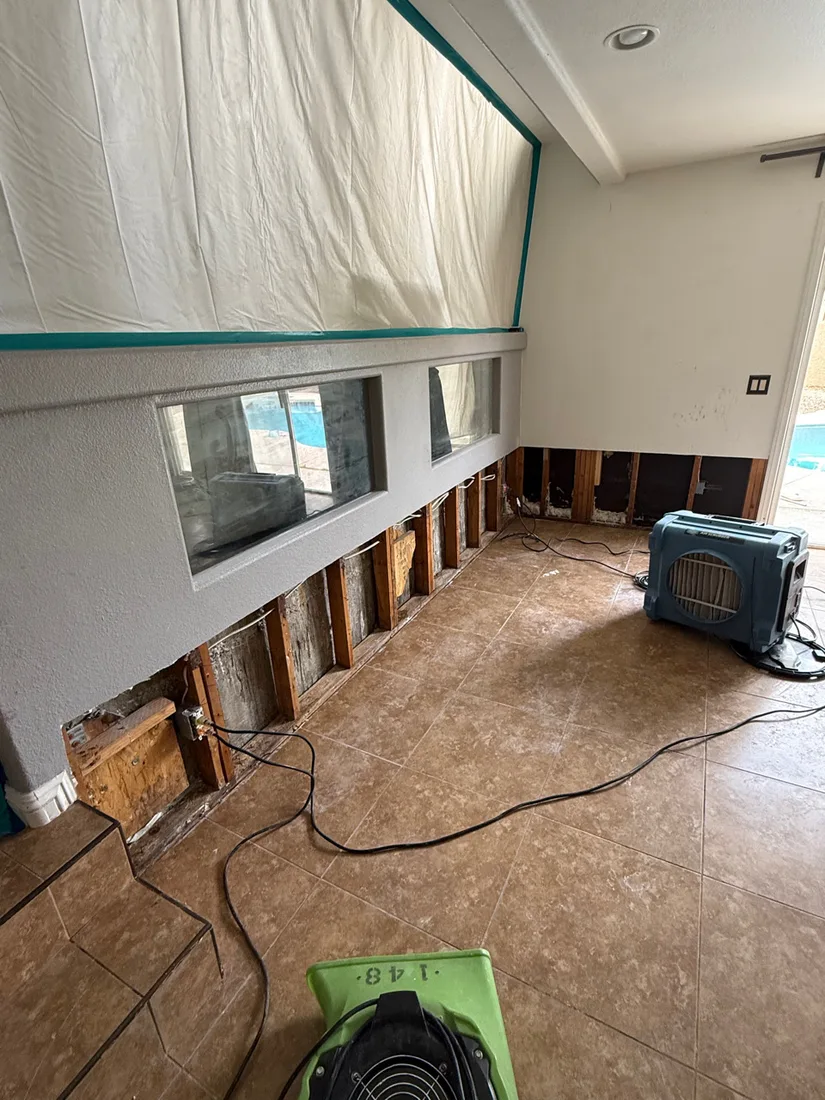
- Check behind baseboards and under flooring edges. Water travels farther than you think.
That last step trips people up. A homeowner mops up the visible puddle, calls it done, then finds mold growing behind the drywall six weeks later. Water wicks into materials you can’t see from the surface.
Where DIY Cleanup Works
Small spills on tile or sealed concrete are the easiest wins. Think of a bathroom overflow you caught quickly, or a dishwasher leak on a tile kitchen floor. If the water stayed on a hard surface and never reached carpet, pad or the inside of a wall, you’re in good shape.
A few conditions need to be true for DIY to work:
- The affected area is smaller than a standard bathroom (roughly 40 square feet)
- Water sat for less than 24 hours
- No water reached wall cavities or the subfloor, or got into the HVAC
- The source was clean water only
If all four boxes check out, grab your fans and get to work.
The Catch Most People Miss
You probably don’t own a moisture meter. Most homeowners don’t. Without one, you’re guessing whether materials dried. A wall can feel dry to the touch while holding 30% moisture content deep inside. That’s a mold problem waiting to happen.
We’ve walked into Henderson homes where the owner did everything right on the surface. Mopped up fast, ran fans for days, even pulled back some carpet. Behind the vanity cabinet? Soaked drywall. Under the tack strip? Wet subfloor. The visible cleanup looked fine. The hidden damage told a different story.
So yes, you can handle minor clean-water incidents yourself. If you’re unsure whether moisture is hiding somewhere you can’t reach, that’s when it makes sense to connect with Henderson water damage restoration professionals who carry the right detection equipment. A quick moisture reading can confirm your DIY work finished the job.
And if the water came from anywhere other than a clean supply line? Skip the DIY route entirely.
Signs Your Water Damage Has Moved Beyond DIY
By the time you notice some of these signs, DIY stopped being an option days ago.
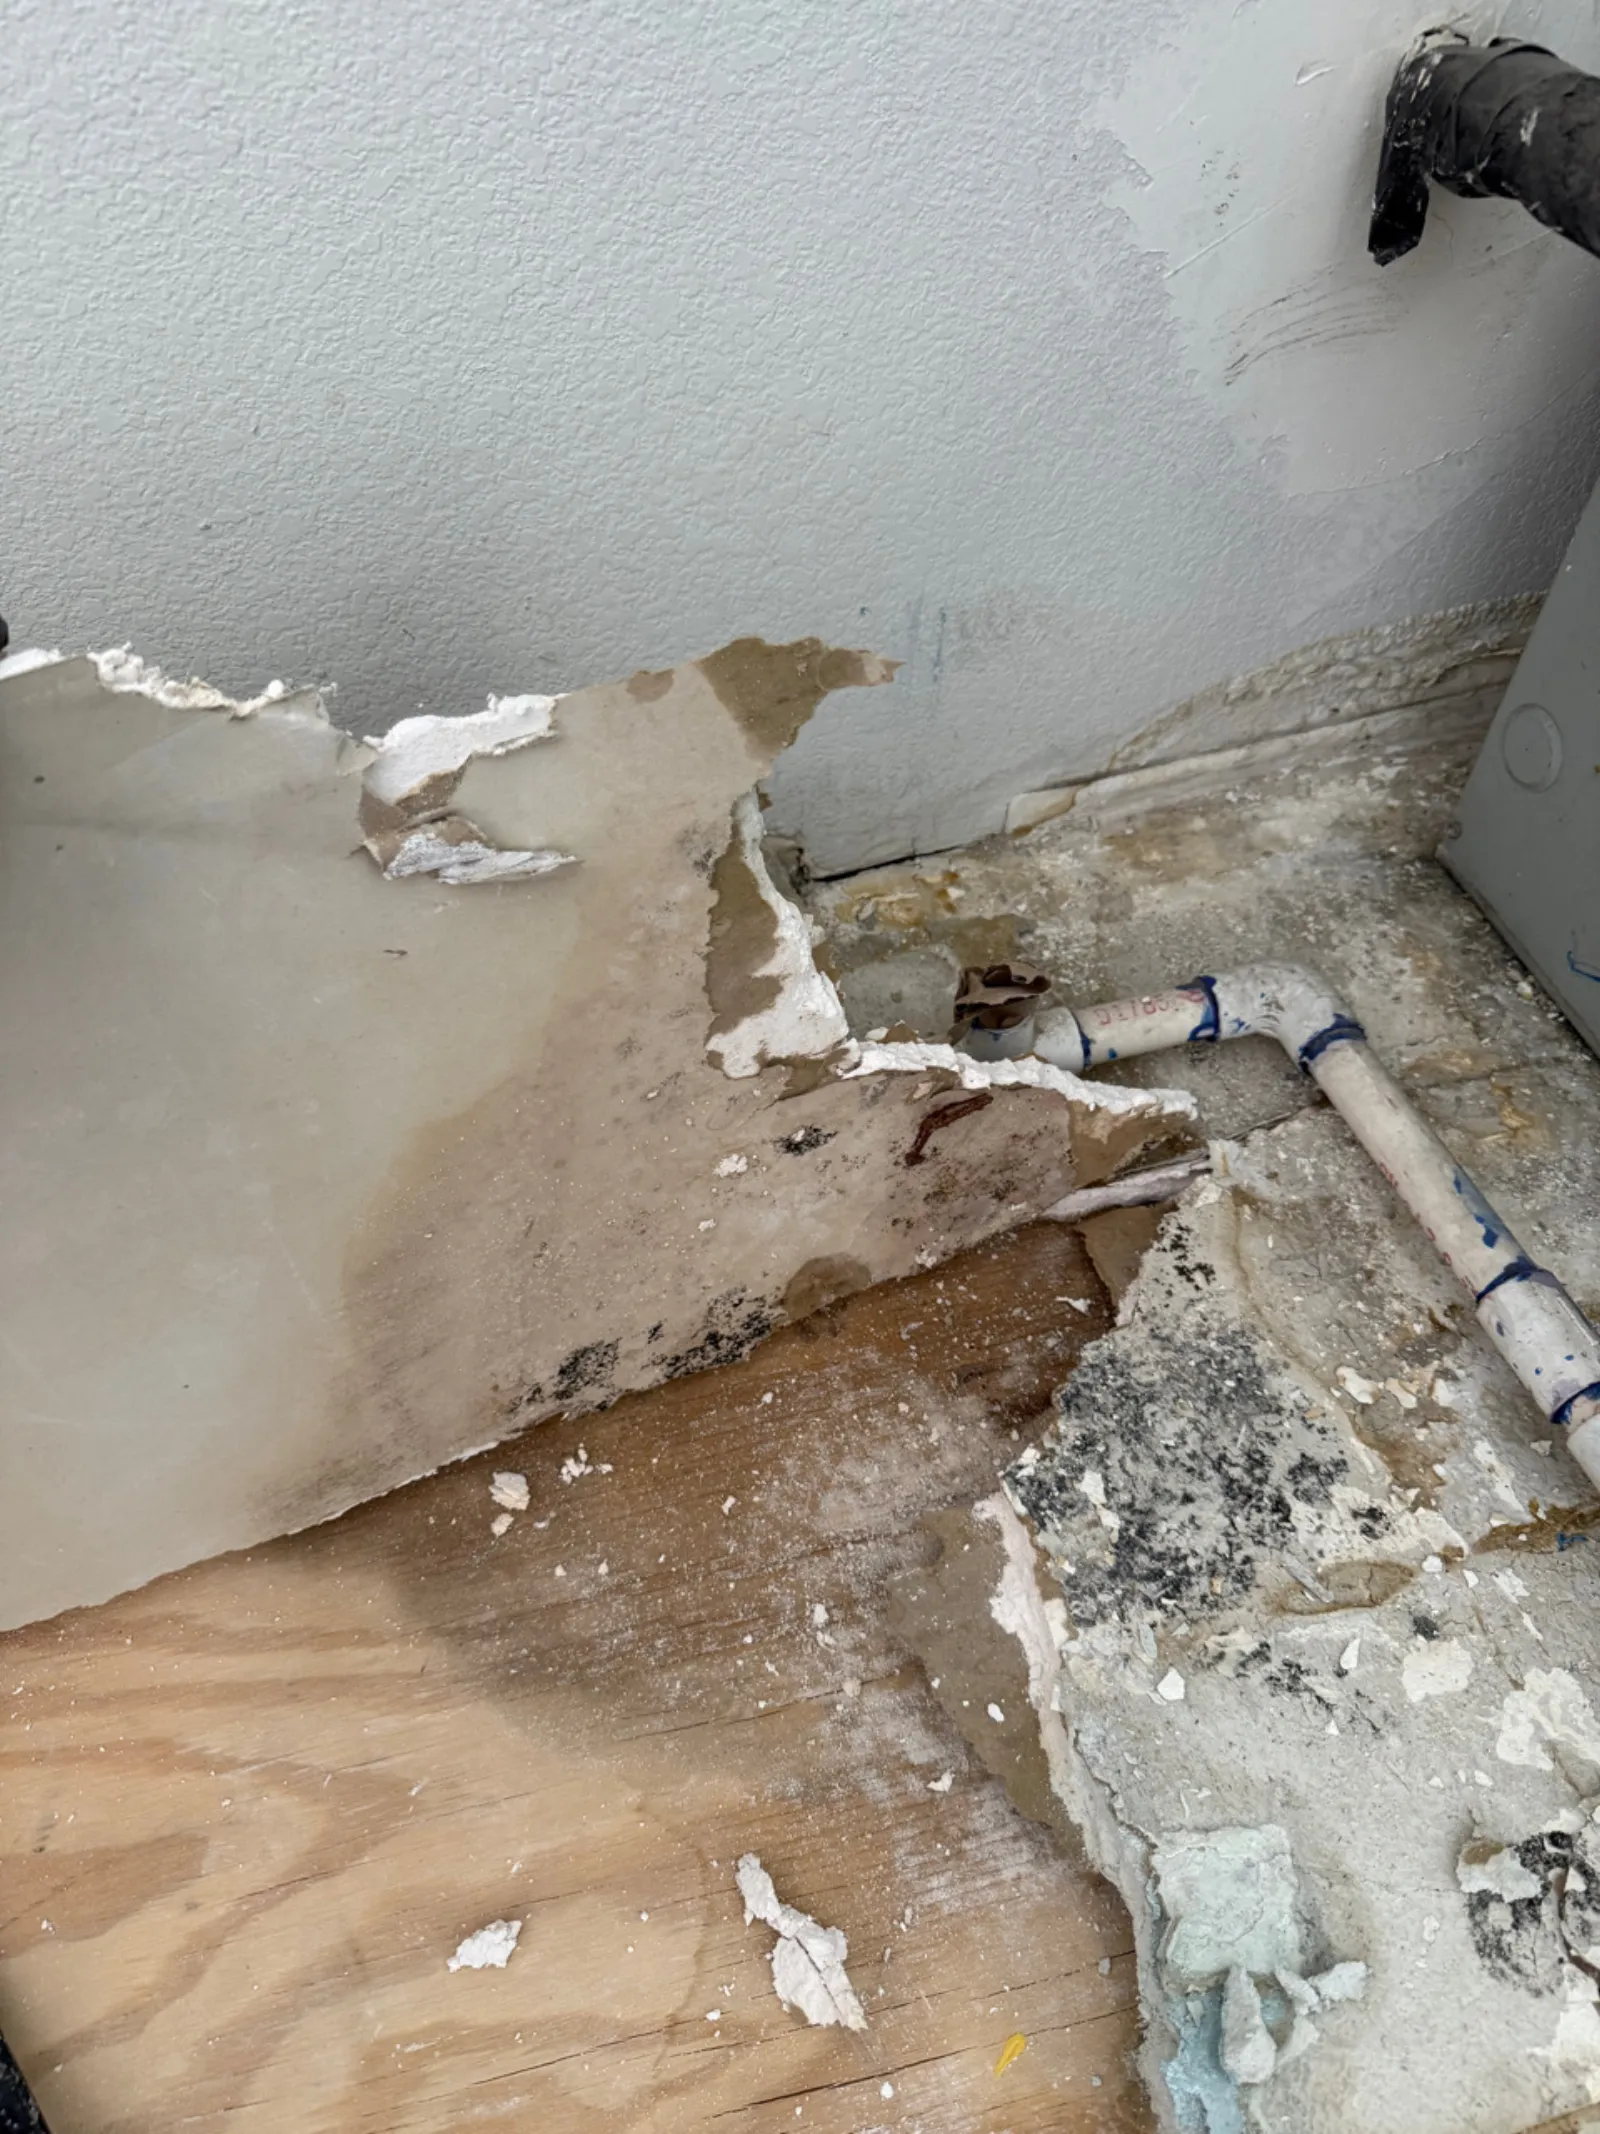
We’ve been called to Henderson homes where the owner thought they had a small leak under the kitchen sink. They mopped it up, ran a fan for a day, and figured they were good. Two weeks later, the baseboards started buckling. That’s when they called us. By then, moisture had traveled through the subfloor and into the wall cavities on both sides of the room.
Visual Red Flags You Shouldn’t Ignore
Some signs are obvious. Others hide behind drywall. If you spot any of these, your water damage has likely moved past what a shop vac and some towels can fix:
- Paint bubbling or peeling on walls or ceilings
- A musty smell that won’t go away after cleaning
- Soft or spongy spots in flooring or drywall
- Visible mold growth in any color, even small patches
- Discoloration that keeps spreading or returning
That musty smell is a big one. Odor means moisture is trapped somewhere you can’t see. A fan won’t reach it. A dehumidifier alone won’t solve it.
What Moisture Meters Reveal
Professional restoration crews use moisture meters and thermal imaging cameras for a reason. Water follows gravity and capillary action. It moves sideways through drywall. It pools under vinyl plank flooring without any visible trace on the surface.
Can you see behind your walls? No.
We regularly find moisture readings above 20 percent in materials that look completely dry to the naked eye. Under IICRC standards, materials have to reach their dry standard before the job is complete. Without proper measurement tools, you’re guessing.
The Mold Timeline
That 24-to-48-hour EPA window applies here too. People assume the low humidity protects them. It doesn’t, not when water is trapped inside a wall cavity or under cabinets. That enclosed space creates its own microclimate.
If your water damage happened more than two days ago and you haven’t verified everything is dry with instruments, mold growth is a real possibility. DIY water damage restoration can’t address what you can’t confirm.
Structural Concerns That Demand Pros
Water-damaged drywall loses its structural integrity fast. Particle board swells and crumbles. OSB subfloor delaminates. These aren’t cosmetic problems you patch over.
Particleboard cabinet bases and older drywall don’t bounce back once they’ve soaked. If you press on a wall and it gives, that section probably needs to come out.
Documentation matters here too. If you handle a claim-sized loss yourself with no moisture readings or photos, the adjuster has little to go on. Professional crews document from day one: moisture maps, daily readings, where each piece of equipment sat. That paper trail is what your carrier reviews.
If you’re seeing any of these signs, get a professional assessment before the damage spreads. We do free on-site estimates, and if you’re paying yourself instead of filing a claim, ask about our self-pay discount. Our water damage restoration page walks through what the process looks like.
Water still spreading? Every hour it sits, the repair gets bigger.
Quality 1st Restoration answers 24 / 7 / 365 across Henderson and the Las Vegas Valley.
888-453-3591